Getting Started with In-Home Lifestyle Newborn Photography: The Bare Essentials

If you're a photographer interested in niching down to newborn photography, you've probably come across a huge variety of newborn photos online. The sheer number of styles, setups, and equipment can be overwhelming. However, the good news is that you don’t need tons of gear to get started. With a few key essentials, you can begin taking beautiful in-home lifestyle newborn photos.
1. Experience with Newborns

First and foremost, before you even pick up a camera, you need to feel comfortable around newborns. Newborns are delicate, and knowing how to hold and handle them safely is crucial. This isn’t just about the technicality of posing; it’s about handling a newborn with proper support and gentleness. Treat each baby as if they were your own precious child. This mindset will help you create a safe, calm environment, allowing you to photograph natural, serene moments that parents adore.
Tip: If you need more hands-on experience with newborns you can become a volunteer baby cuddler for your local Neonatal Intensive Care Unit (NICU).
2. The Right Camera and Lens: Quality Over Quantity

For in-home newborn photography, a DSLR or mirrorless camera is essential. While a crop sensor camera can work, a full-frame camera is better for low-light performance. As for lenses, a prime lens with an aperture as low as f/1.8 is a must-have.

A 35mm or 50mm lens is perfect for this type of photography. These lenses allow you to stay close enough to the baby to reach them if necessary while achieving a variety of shots, from full-body portraits to intimate close-ups. If you have the option, a longer lens like an 85mm or 105mm can add diversity to your images, especially when photographing parents with their newborn. However, these lenses are not necessary when starting out.
What I use: A Nikon Z 7II Mirrorless camera and a NIKKOR Z 50mm f/1.8 S lens
Tip: Look for a used or refurbished camera and/or lens from a reputable seller (I cannot stress this enough). I saved thousands of dollars in my early days buying used camera gear from a brick-and-mortar camera shop.
3. Lighting Equipment: Don’t Shy Away from Flash
Natural light is often the go-to for in-home newborn photography, but relying solely on window light can be risky and limiting. Cloudy days or small windows might leave you with images that are grainy or blurry. To avoid this, invest in a speedlight with a wireless transmitter (and receiver) and a tripod. The trick is learning how to use it.
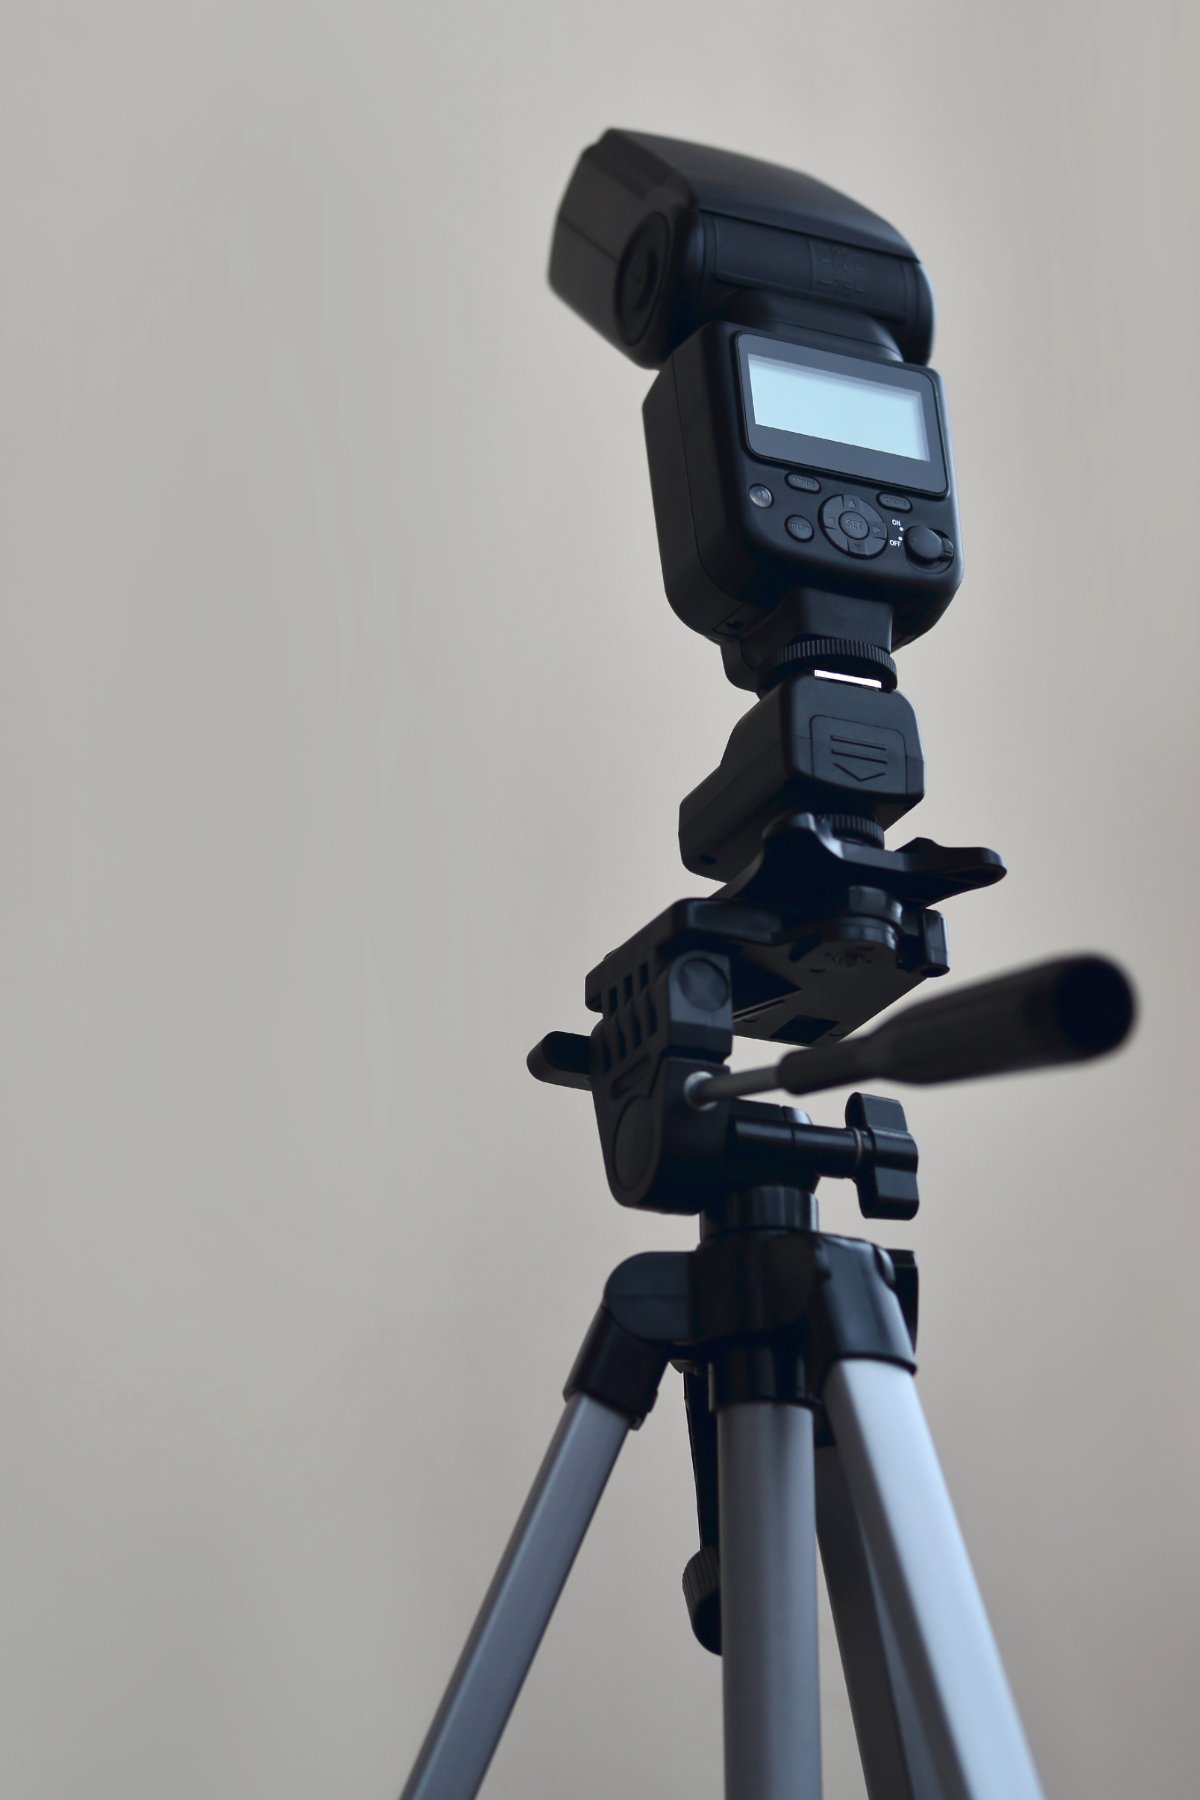
Proper use of a speedlight enhances the detail and color in your photos, giving them a professional quality. Don’t point the light directly at your subject. Position the speedlight on a tripod and experiment with bouncing the light off the ceiling, a wall, or a window while varying the angle, intensity and distance from the subject for a soft, flattering glow. It is essential that you know your speedlight well and practice ahead of time. This will help you achieve powerful yet soft, natural looking light.
Why a speedlight instead of a strobe with a diffuser? A speedlight and tripod are small and transportable. You can easily pack it in your car and carry it around your client’s home.
What are a transmitter and receiver? They are what you need to make your camera communicate with your speedlight when they are not physically connected. The transmitter attaches to the top of your camera (the Hotshoe) and the receiver is either built into the speedlight or attaches to the bottom of your speedlight.
What I recommend: A Nikon SB-5000 AF Speedlight, a Nikon WR-R11a wireless transmitter, and a NEEWER 8.5ft/2.6m Air Cushioned Light Stand
Tip: If you need a speedlight for a different camera brand, online stores such as B&H, Adorama and Westcott are great places to start. Remember that in order to use a speedlight off-camera you need a wireless transmitter (also sometimes called a trigger or remote controller), and receiver often sold separately from the speedlight.
4. A Vision: Plan Your Shots
Once you’ve booked your first newborn session, it’s time to develop a clear plan. Planning ahead will not only help the session run smoothly but also ensure you don’t miss any important shots. Start by thinking about the key moments you want to photograph:

Baby alone in various poses
Macro shots of baby (close ups of baby’s hands, feet, eyes, etc.)
Baby with mom and dad
Baby with each parent individually
Baby with siblings (if applicable)
The whole family together
If you ever feel stuck or uninspired, don’t hesitate to look online for examples of in-home newborn photography (But don’t ever use other photographers’ photos to attract business!). You can start by replicating what you see, and with time, your own creativity and unique style will begin to shine through.
Final Thoughts
Getting started with in-home newborn photography doesn’t require a lot of gear or years of experience. With a gentle touch, the right camera and lens, a good lighting setup, and a clear vision for your sessions, you’ll be well on your way to photographing those first precious baby moments that families will value for generations.
